

How to Reverse a Clip in Premiere Pro — A Step-by-Step Guide
Premiere Pro is used for editing videos, commercials, and other films, television, and online video.
Adobe Premiere Pro is a timeline-based and non-linear video editing software application developed by Adobe Inc. and published as part of the Adobe Creative Cloud licensing program.
Adobe Premiere Pro is a successor of Adobe Premiere.
Premiere Pro is the industry-leading video editing software for film, TV, and the web. Creative tools and integration with other apps and services help you craft footage into polished films and videos.
It’s essentially an all-in-one video editing program with motion graphics and audio mixing capabilities.
It has become a recent trend that people want to watch their videos playing in reverse mode and for that reason, they keep looking for some cool video editing software.
Once you learn how to speed up and reverse your footage in Premiere Pro, you can use these techniques for creative transitions and visual effects.
How to Reverse a Clip in Premiere Pro — A Step-by-Step Guide
Table of Contents
How to Reverse a Clip in Premiere Pro — A Step-by-Step Guide:-
Here is a simple step-by-step guide that will help you get the answer to this frequently asked answer.
Follow these simple steps to reverse your clip in Premiere Pro. We’ll walk you through how to reverse a clip in Premiere Pro step-by-step.
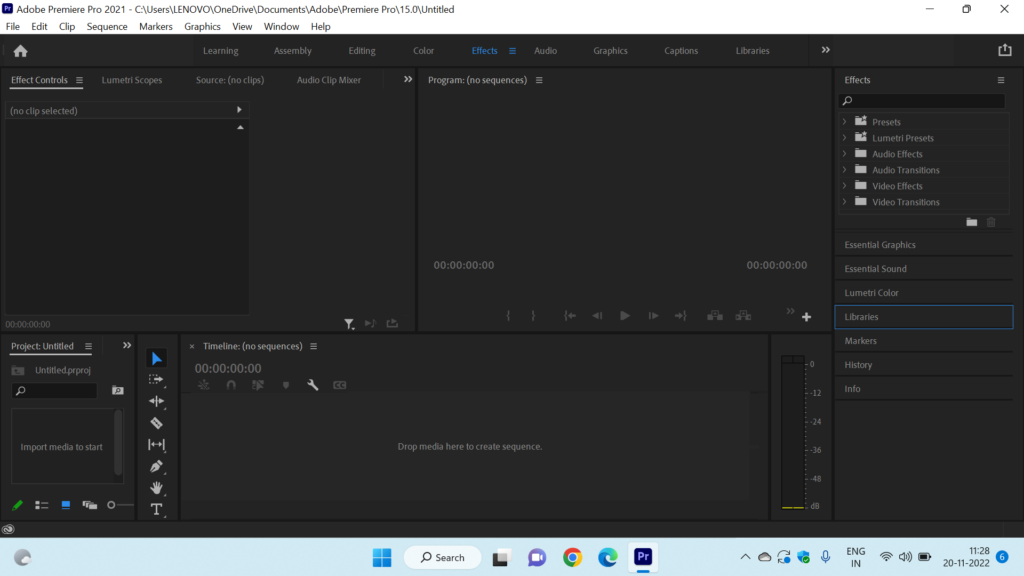
Step 1: Open Adobe Premiere Pro
Download and install Premiere Pro.
Once Adobe Premiere Pro is open and you have created a new sequence. First, open Adobe Premiere Pro and you have to select the option “new” and then the “project” option Click the “OK” button to reverse the clip. You can do this by either clicking “File” → “Import” or by simply dragging the video file(s) into your project bin in Premiere.
How to Reverse a Clip in Premiere Pro — A Step-by-Step Guide
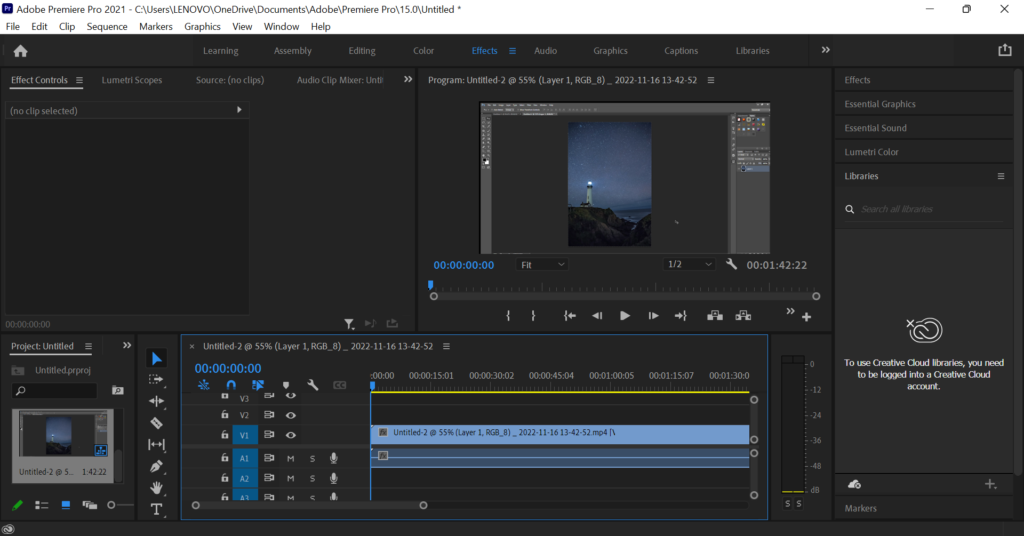
Step 2: Import Footage
Once you open Adobe Premiere Pro then import the footage that you wish to reverse. After creating a new project, you will see the video editor. On the bottom left side, there is an import window. You can import the media that you want to edit. Launch Adobe Premiere Pro and click Import. Select the video clip that you want to edit. you are ready to make your selection and prepare it for the timeline.

Step 3: Drag the video into the Timeline
Premiere Pro works on Windows and Mac. You can download it to edit your videos. The next step is to drag the footage into the timeline. If you plan to reverse the entire clip, then you can simply drag it into the timeline or use the keyboard shortcuts Locate the video file you want to reverse on the timeline or drag it onto the timeline.
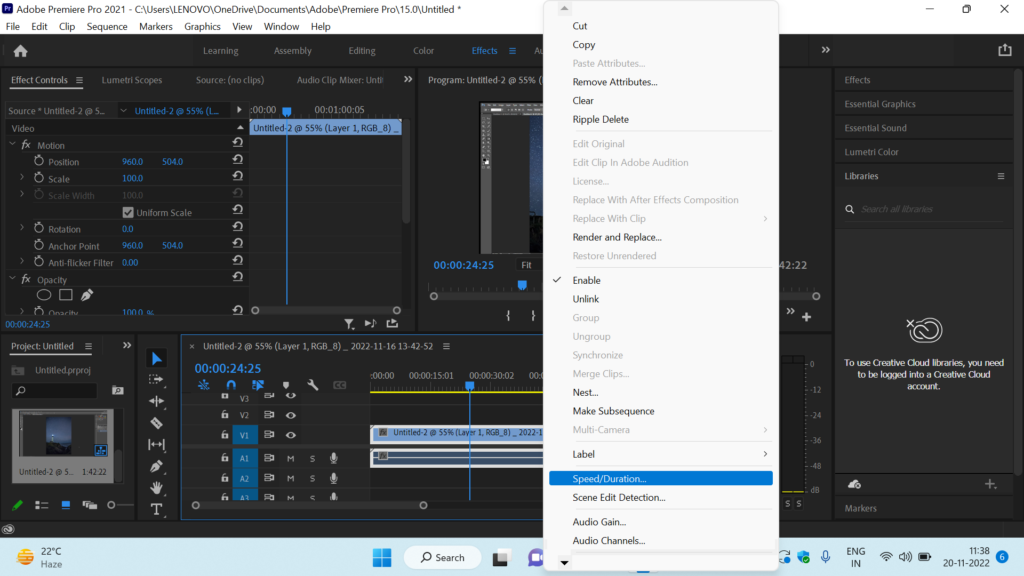
Step 4: Go to “Clip,” then click Speed/Duration”
Now, as the video is on the timeline, we want to apply an effect that will reverse the video clip. There are two methods to play a clip in reverse. You can use any of these to reverse a video.
The first method is to go to the search bar of effects. Search for “Transform“. Under the folder of “Video Effect” > “Distort“, you will see transform. Drag the transform on the video on your timeline. An effect control tab will open. Uncheck the box “Uniform Scale“. Set the “Scale Width” to minus 100 (-100) to reverse your video. Now play the video; it will play in reverse.
Select Speed/Duration from the menu that opens by right-clicking on the Clip’s name. The Clip Speed/Duration panel is where all the magic happens. This hidden tool isn’t found under the Window menu, where all of the other control panels live.
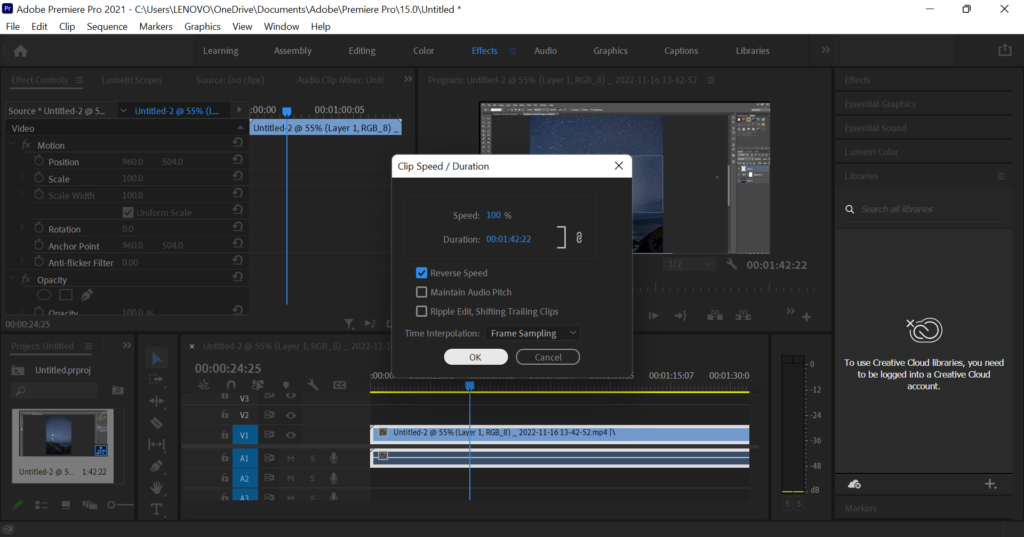
Step 5: Reverse the Video
If you want your clip reversed and speed up/slowed down, you can do both at the same time. In the box that appears, check the “Reverse Speed” checkbox.
If you want your clip to play twice as fast, enter 200% into the value box. For three times as fast, 300%, and so on. Once you hit enter, the new duration of your clip will appear below. Hit “OK,” and you’ll be able to preview your new sped-up clip in the clip viewer.
Reverse a Clip in Premiere Pro
Step 6: Import Media
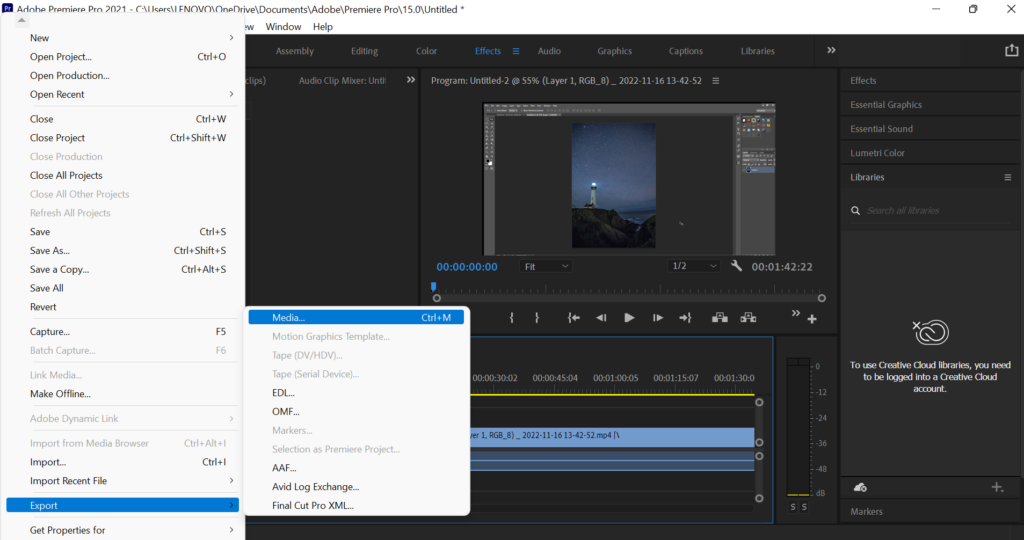
After reversing the video clip, you can export the video to your PC. Go to File > Export > Media to save your edited video. Or you can simply press “Ctrl + M” to export your video from the Premiere Pro timeline to your desired destination.
Advanced Techniques for Reversing Clips in Premiere Pro
Presently simply know the nuts and bolts of switching a clip in Premiere Pro, here are a few progressed strategies to require your video altering to the next level:
- Switch As if it were a Parcel of Your Clip
In case you merely need to switch a parcel of your clip, basically utilize the “Razor” device to part the clip into two parts. Then, apply the “Reverse Speed” effect to the section you want to reverse.
- Add a Speed Ramp
To add a speed ramp to your reversed clip, simply use the “Time Remapping” feature. This permits you to alter the speed of your clip over time, making a more energetic impact.
- Use the Frame Blend Option
If you notice that your reversed clip appears choppy, you can use the “Frame Blend” option to smooth out the effect. To do this, basically right-click on the clip within the timeline and select “Outline Mix.” This will make interpolated frames that fill within the crevices between the outlines of your turned-around clip, coming about in a smoother impact.
- Add Audio Effects
If your reversed clip includes audio, you may want to add some audio effects to enhance the overall effect. Debut Professional incorporates an assortment of sound impacts merely can apply to your clips, such as reverb, resound, and twisting.
Reverse a Clip in Premiere Pro
FAQs
Q: Can I reverse multiple clips at once in Premiere Pro?
A: Yes, you can reverse multiple clips at once by selecting them all and applying the “Reverse Speed” effect.
Q: Will reversing a clip affect the audio as well?
A: Yes, reversing a clip will also reverse the audio. If you want to keep the audio playing normally while reversing the video, you can detach the audio from the video clip and reverse them separately.
Q: Can I reverse a clip that has already been edited?
A: Yes, you can reverse a clip that has already been edited by simply selecting the clip and applying the “Reverse Speed” effect.
Conclusion:-
Reversing a clip in Premiere Pro is a simple process that can add a lot of variety and creativity to your video editing. Whether you are a tenderfoot or an experienced editor, knowing how to reverse a clip can assist you to take your recordings to the following level.
With the step-by-step direct and progressed methods we’ve covered in this article, you presently have the information to make one-of-a-kind lock recordings that stand out from the swarm. So, go ahead and try it out for yourself, and see how reversing a clip can transform your video editing.


