

Premiere Pro is best for editing or splicing audio and video clips together into a sequence. There are a variety of ways that DU staff and faculty can utilize Premiere Pro: Import footage and edit recorded lectures or guest speakers.
Premiere Pro is designed for a video editor’s post-production workflow. It’s equipped with a suite of powerful editing tools for content creators and filmmakers to organize and edit video files as well as to enhance and fine-tune audio and image quality.
Read Also: Add a keyframe in premiere pro
Table of Contents
Add a keyframe in premiere pro Steps by Steps guide:-
Add a keyframe in premiere pro Steps by Steps guide:-
Keyframes are essential to creating animated effects and motion graphics in After Effects. With Programmes like Animate or Character Animator, you deal with only the animation portion of your production. But with After Effects, you can composite animated elements onto real-world video clips.
The keyframes have special information on where a transition should begin and end. The delusion of motion is created by the frames inserted in the middle of the start and end of the transition.
Add a keyframe in premiere pro
Part 2. How to Add Keyframes in Premiere Pro
Add a keyframe in premiere pro-
1-Import video in Premiere pro

Open Premiere Pro and build a new project. Click Import to add the video that you want to animate. Now, drag it to the timeline. If you want to use the timeline function, you need to make it visible first if it is not visible by default.
To import media files using the Media Browser panel, browse to the files you’d like to import, select the clips you want to work with in Premiere Pro, right-click one of the selected clips, and choose Import. Once the media is imported, you’re ready to edit.
Add keyframe in premiere pro
2-Start Adding keyframes in Premiere pro
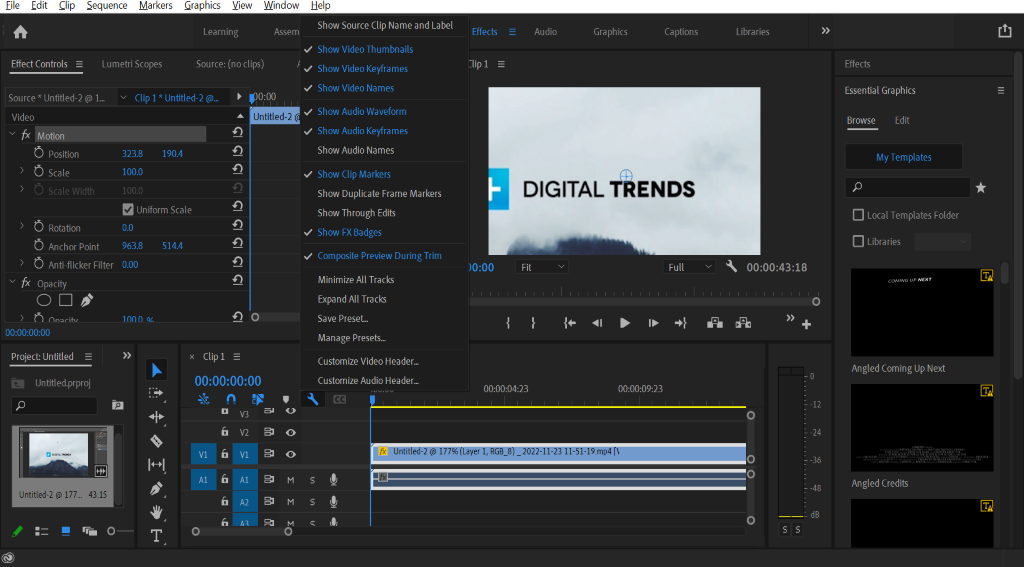
First, you have to do is to, make sure you select the video clip to which you would like to add the keyframe animation. Then go to the Effect Controls Panel or Timeline – This panel is specifically designed to view various attributes of your video clip which include Position, Rotation, Opacity, etc.
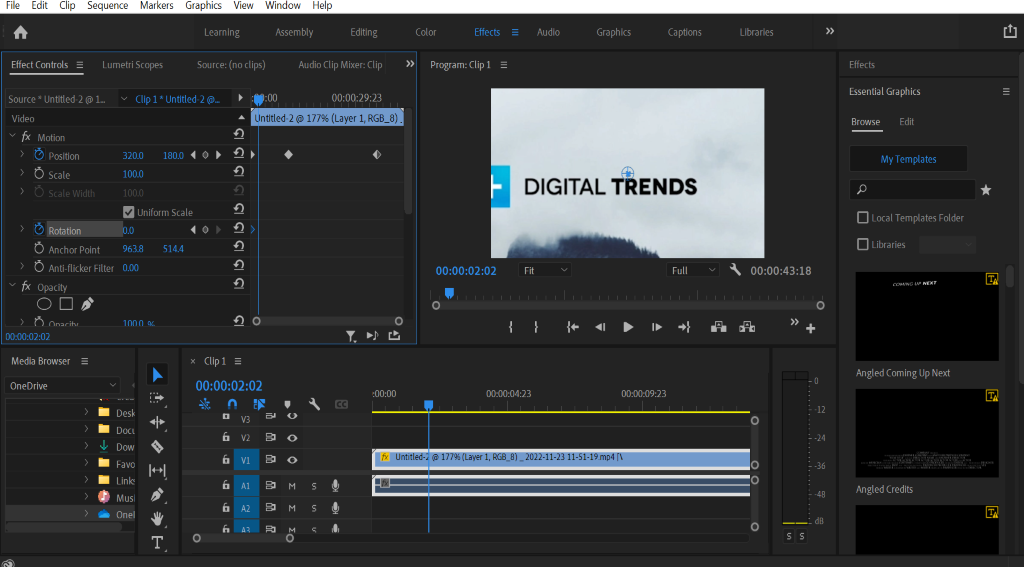
After that select the effects panel. you’ll notice this little stopwatch icon and that’s the toggle animation or keyframes button so what happens is whenever you press this button you see that it will be a little diamond. which is a keyframe and this will allow animation.
Allow us to animate between different parameters so what that means is if I create a keyframe here at 100 and then I move over a second on the timeline and then I create another keyframe which will automatically happen when I change it’ll create two keyframes and now play through those keyframes you’ll start at 100 and it will play and animate up to whatever else to set it to 135 and you also create many keyframes whatever you want. If you to create animated effects so I can move over even a little bit more and then hit this reset button to get back to 100 or whatever the default parameters were and you have three keyframes.
Add keyframe in premiere pro
3-How to Add Rotation to Your Clip
Go to effects control, Go to the Effect Controls tab, and click on the Motion dropdown. This will reveal the Rotation dropdown. Click on the number (the blue text represented in degrees) beside Rotation and enter your desired degrees. You can rotate the video by 90, 180, or 270 degrees.
If you need to rotate your video, open the Effects Controls panel, select Motion, and type your desired degree rotation or slide the arrows to find it.
Add keyframe in premiere pro
4-How to Add Flip Video in Premiere Pro

Flipping a video describes the creation of a mirror image of the original footage. Whether you’re editing a professional video shot with an HD video camera or a holiday film shot with a camcorder or iPhone, you don’t want your cuts to disorient the viewer.
Read Also:- How to Resize an Image in Adobe Photoshop
Use the Horizontal Flip or Vertical Flip effects in Adobe Premiere Pro, which is compatible with nearly every low- or high-definition video file format, including FLV, MOV, WMV, and MP4 files. With a Horizontal Flip, you create a mirror image of the original clip — what’s on the left now appears on the right.
Add keyframe in premiere pro
IMPORTANT POINT:-
- Keyframes allow you to create smooth transitions between clips or adjust effects over time.
- Keyframes can be added to audio or video clips, as well as effects.
- To include a keyframe, essentially press on the timeline where you need the keyframe to be set.
- You’ll alter the position of keyframes by dragging them along the timeline.
- Keyframes can be deleted by selecting them and pressing the delete key.
- Copying and pasting keyframes can save time when working on multiple clips.
FAQs:
Q: What is the purpose of keyframes in Premiere Pro?
A: Keyframes allow you to create smooth transitions and adjust effects over time.
Q: How do I add a keyframe in Premiere Pro?
A: Simply click on the timeline where you want the keyframe to be placed.
Q: Can I adjust the position of keyframes?
A: Yes, you can drag keyframes along the timeline to adjust their position.
Q: How do I delete a keyframe in Premiere Pro?
A: Select the keyframe and press the delete key.
Q: Can I copy and paste keyframes in Premiere Pro?
A: Yes, copying and pasting keyframes can save time when working on multiple clips.
Conclusion:
Including keyframes in Adobe Debut Master can appear overwhelming, to begin with, but with a small hone, it gets to Add probe a fundamental apparatus for making smooth moves and inventive impacts in your recordings. Remember to experiment with different types of keyframes and be patient with your editing. By acing keyframes, you’ll take your video-altering aptitudes to another level and deliver professional-quality recordings. So, go ahead and try adding keyframes in Adobe Premiere Pro – it’s easier than you think!


