

Transition in Premiere Pro
Adobe Premiere Pro is a timeline-based and non-linear video editing software application (NLE) developed by Adobe Inc. This is also known as the Adobe Creative Cloud licensing program. First launched in 2003, Adobe Premiere Pro is a successor of Adobe Premiere first launched in 1991.
The premiere was one of the first computer non-linear editing systems. The first version for Mac was released in 1991, and the first version for Microsoft Windows was released in September 1993. The project began at Super Mac Technology as Reel Time, a QuickTime-based video editor for its Video Spigot video capture card.
Finding and adding transitions is a very easy process. You’ll be able to find all your transition options in the Effects panel, which you can access from the topmost options bar. Select this and the panel will appear on the right. Follow these steps to then add your transition.
Most Useful Premiere Pro Keyboard Shortcuts:-
1-NEW PROJECT – CTRL+ALT+N
2-NEW SEQUENCE – CTRL+N
3-IMPORT MEDIA – CTRL+I
4-EXPORT MEDIA – CTRL+M
Table of Contents
Transition in Premiere Pro— A Step-by-Step Guide:-
Here are the basic steps to follow:
Part 1- Creating a Steps
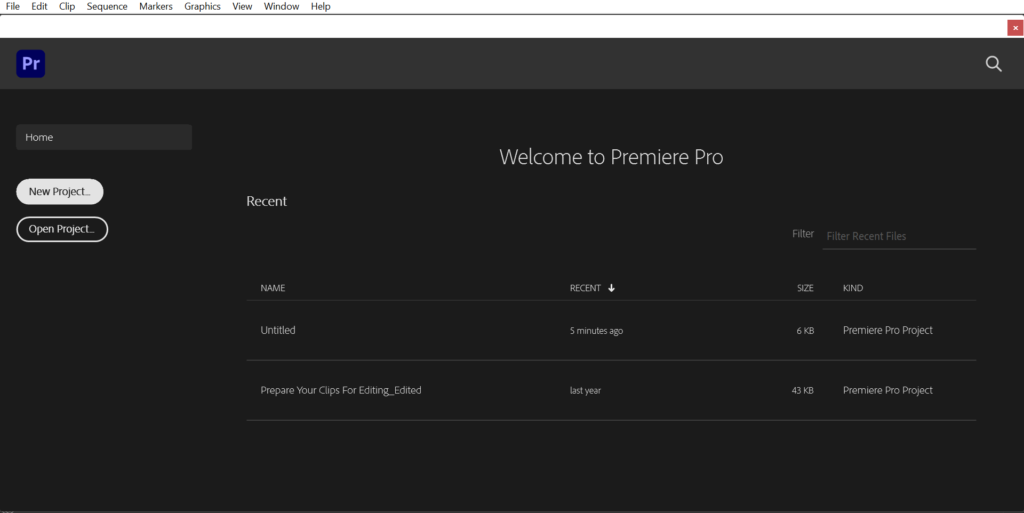
Step 1:- Open Adobe Premiere Pro. It has an icon that says “Pr” in the middle. Click the Adobe Premiere Pro icon in the Windows Start menu or Applications folder on Mac or anywhere else the icon appears on your computer to launch Adobe Premiere Pro. When you first open up Premiere, a welcome screen appears where you can either create a new project or open up an existing one.
Transition in Premiere Pro
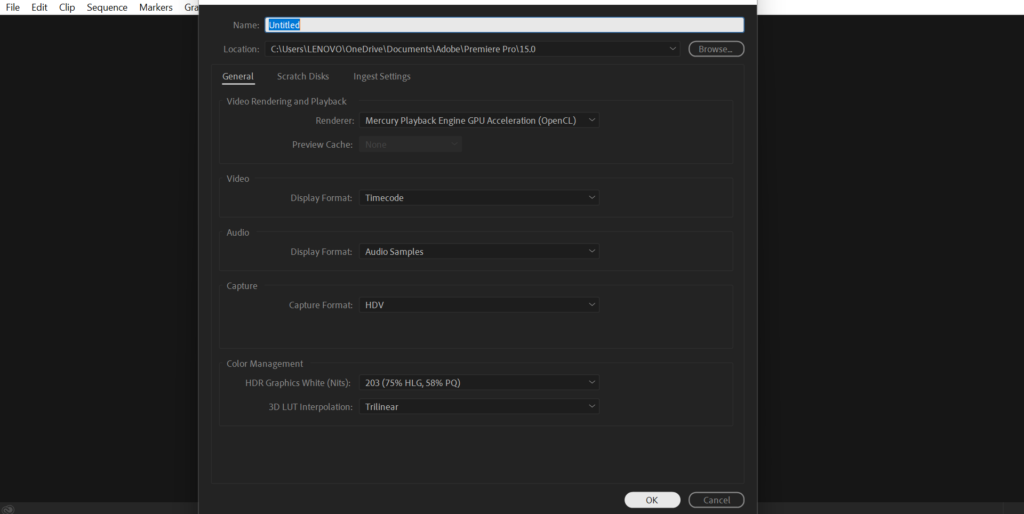
Step 2:- Open or create a new project. To create a new project, click New Project on the title screen and then follow the instructions to select the video format and name for the project. You also click Open Project and select a saved project and click Open. You can also click one of your recent projects under “Recent projects”.

Step 3:-To import media files using the Media Browser panel, browse to the files you’d like to import, select the clips you want to work with in Premiere Pro, right-click one of the selected clips, and choose Import. Once the media is imported, you’re ready to edit.
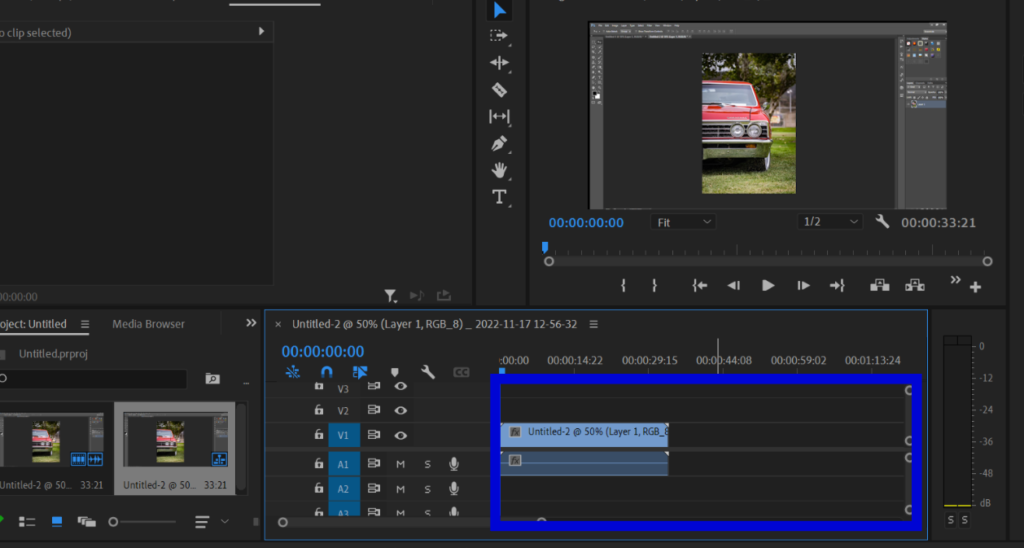
Step 4:-You can drag a clip and place it in an empty spot or snap it to another clip. You can also insert and overwrite clips that you move. Watch the translucent rectangle that represents the clip’s duration as you drag it. To move multiple clips, select a range of clips, or move a group of clips. A tool tip displays the amount of time moved as you drag.
Part 2- How to add a Transition
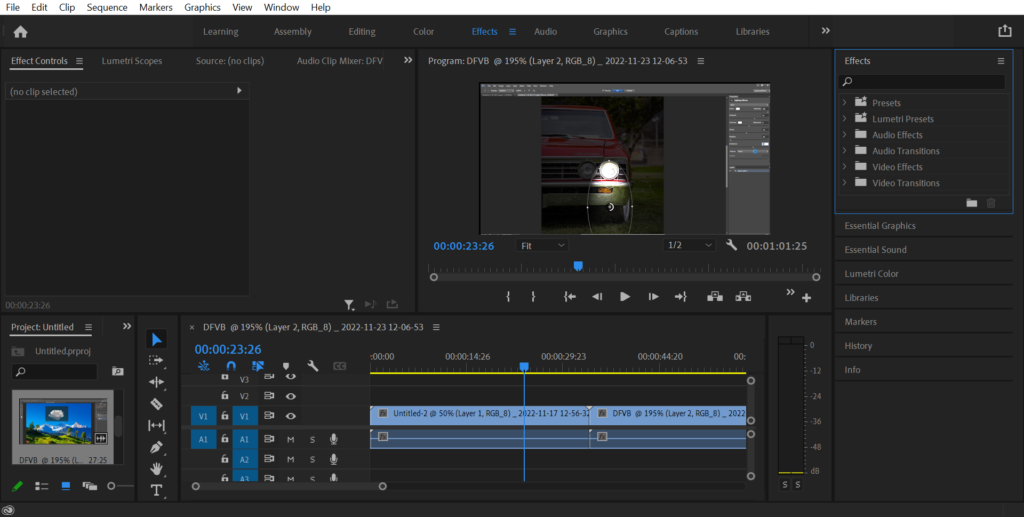
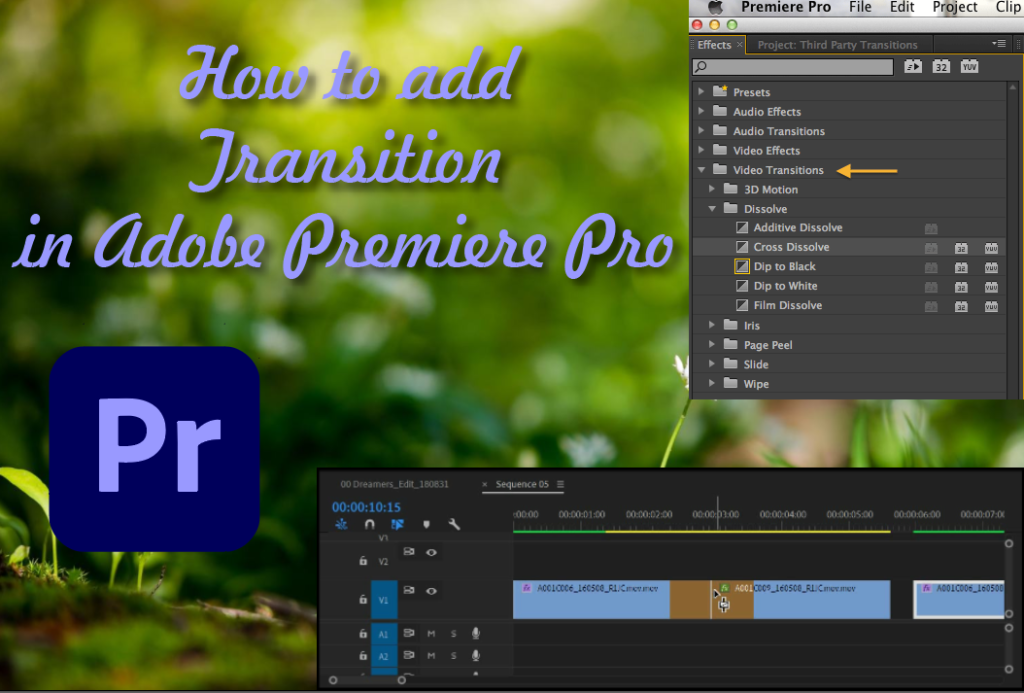
Step 1:- Click on the Effects tab. It’s at the top of the panel in the upper-right corner.
If you don’t see the effects panel tab, click Window in the menu bar at the top. Then click Effects to open the Effects panel.
There are lots of Transitions like Presets, Lumetri presets, Audio Effects, Audio transition, Video effects, Video transition, 3D motion, Dissolve, Iris, Page peel, and Slide.
The most common transition is the Cross Dissolve. This creates an effect where one video fades out and the next video fades in on top of it. This is found in the Dissolve folder.
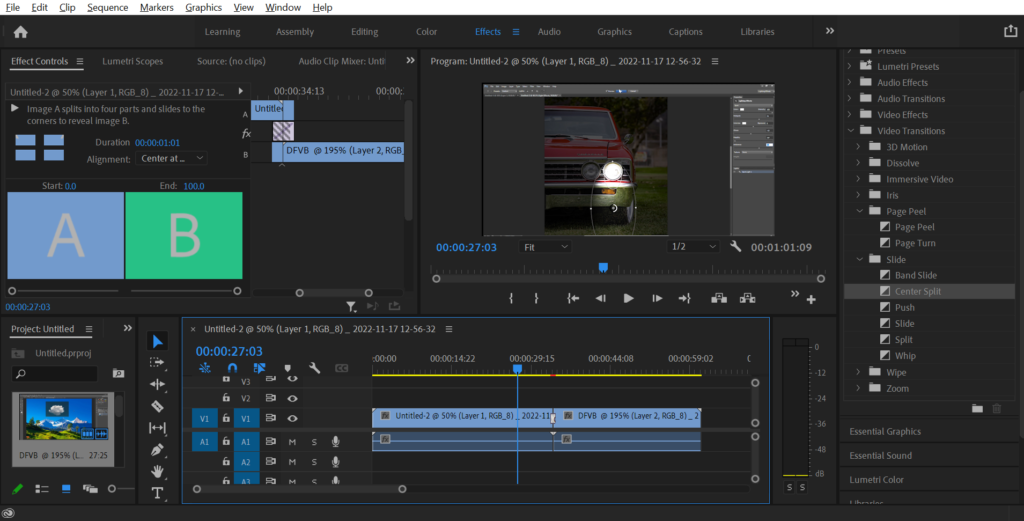
Step 2:- Drag and drop a transition into position over two video clips in the timeline
- Select the slide you want to add a transition to.
- Select the Transitions tab and choose a transition. Select a transition to see a preview.
- Select Effect Options to choose the direction and nature of the transition. …
- Select Preview to see what the transition looks like.
If you don’t see the Effects Control tab in any of the panels, click Window in the menu bar. Then click Effects Control to open the Effects Control panel.
You can also set the alignment of the transition Use the drop-down menu next to “Alignment” to set the transition alignment.
You can also set adjust the duration of the transition This allows you to control how long the transition lasts. Locate “Duration” in the Effects Control panel.
You can also set the reverse direction of the transition To reverse the direction of the wipe, click the checkbox next to “Reverse” in the Effects Control panel.
You can also set the Adjust the border of the transition Some transitions can display a line between the first clip and the second clip. This is the border. You can adjust the following aspects of the border.
- Border Width: To adjust the border width click and drag the number next to “Border width” in the Effects Control panel. …
- Border Color: To change the color of the border, click the colored box next to “Border Color” in the Effects Control panel.
Transition in Premiere Pro
Tips for Using Transitions Effectively:
- Use transitions sparingly. Too many transitions can make your project look amateurish.
- Choose transitions that fit your project’s style and tone.
- Make any doubt your moves are long sufficient to be recognizable but not so long that they get to be diverting.
- Use audio transitions to smoothly transition between audio clips.
- Experiment with different transition types to find the ones that work best for your project.
Habitually Inquired Questions Approximately Moves in Adobe Debut Master:
Q: How do I erase a move in Adobe Debut Professional?
A: Select the move you need to erase and press the Erase key on your console.
Q: Can I apply a transition to only one side of a clip?
A: Yes, you can apply a transition to either the beginning or end of a clip by dragging and dropping the transition onto the appropriate side.
Q: How do I adjust the duration of a transition?
A: You can adjust the duration of a transition by dragging its edges on the timeline or by adjusting the transition settings in the Effects panel.
Q: Can I use third-party transitions in Adobe Premiere Pro?
A: Yes, you’ll be able to purport third-party moves into Adobe Debut Professional and utilize them in your venture.
Conclusion:
Adding transitions to your video project is an essential part of creating a polished and professional-looking video. Adobe Debut Master offers a wide extend of moves to select from, and with a small bit of hone, you’ll utilize them viably to upgrade your recordings.
By taking after the steps laid out in this article, you ought to be able to include moves to your extent with ease and make a consistent stream between your scenes Remember to use transitions sparingly and choose the ones that fit your project’s style and tone. With these tips, you’ll be able to take your video-altering aptitudes to another level and make recordings that genuinely stand out.


